Pajama Pup
Disclaimer: This pattern is my own. You have permission to sell the finished product but not to sell, copy or in any way claim this as your own. Thank you. This post contains affiliate links which means if you purchase something by clicking an add I may receive a commission at no extra cost to you. Thank you for your support.
Hello everyone!
I’ve been crocheting for a long time. For
This time I made a
The whole thing is quite easy and there aren’t any crazy techniques so it would be good for beginners. I’ve added links and explanations to the stitches that I consider a little different.
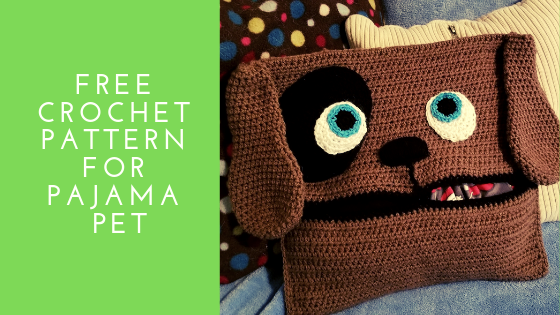
So without further ado here’s my PJ pup.
Materials
For this pattern, I used what I already had, which was a jumbo ball of Red Heart comfort acrylic yarn in taupe. There are 867 yards/792 meters and I used about half of the ball.
A little bit of black yarn for the eye patch, eyes, mouth, and nose.
A small amount of blue or whatever color you want the eyes to be.
Size 3.5 crochet hook
Scissors
Darning needle
Medium-sized button
4 – 6 safety pins

Abbreviations and Explanations
Fsc – foundation single crochet
Instructions on how to make a foundation chain or foundation single crochet.
Ch 2. Insert hook into the second chain from hook. Draw up a loop (you will have 2 loops on your hook), then draw through only the first loop on hook. (consider this first loop of if you were doing a standard foundation chain) You will still have 2 loops on your hook.
Complete SC as normal (draw through both loops). – This would be “row 2” if you were using the regular chain method.
Ch – chain
Sc – single crochet
Sl st – slip stitch
hdc – half double crochet
dec – invisible decrease https://www.youtube.com/watch?v=OUBbOZ1Ennk
Hdc dec – half double crochet decrease. It’s the same as the invisible decrease except using the half double crochet stitch
inc – increase (2 stitches in the same stitch)
(*) – repeat between
Pattern
Body
Fsc – 50
R1 – 76 – ch1, hdc across.
Change to black
R77 – ch 1, sc across. Fasten off
Now attach black yarn to the bottom of the fsc. 25 sc, ch 6, 25 sc, fasten off.
Ears x2
Magic ring with 6 sc
r1 – 2 hdc in each st around (12)
R2 – 1 hdc, inc, repeat (18)
R3 – 2 hdc, inc, repeat (24)
R4 – 3 hdc, inc, repeat (30)
R5 – 10 – ch 1 hdc in each st around (30)
R11 – ch 1, (hdc dec, 13 sc) repeat (28)
R12 – ch 1 (hdc dec, 12 sc) repeat (26)
R13 – ch 1 (hdc dec, 11 sc) repeat (24)
R14 – ch 1 (hdc dec, 10 sc) repeat (22)
R15 – ch 1 (hdc dec, 9 sc) repeat (20)
R16 – 25 – ch1, hdc around (20)
Fasten off with a long tail for sewing.
Eyes x2
With white – magic ring with 6 sc
R1 – ch 1, 2 hdc in each st around (12)
R2 – ch 1, (hdc, inc) repeat (18)
R3 – ch 1, 1 hdc, inc x4, 1 hdc, 12 sc (22)
R4 – ch 1, 3 hdc, 3 inc, 3 hdc, 3 sc, inc, 1 sc, inc, 5 sc (28)
Fasten off with a long tail.
With black – magic ring with 6 sc
R1 – inc around (12)
Switch to blue –
R2 – 1 sc, inc, repeat (18)
Fasten off with a long tail for sewing.
Eye Patch
Ch 6
R1 – sc in 2nd ch from hook, 4 sc, 3 sc in last ch, continue on the bottom side, 3 sc, inc, join with sl st.
R2 – ch 1, 4 hdc, 3 hdc inc, 4 hdc, 2 hdc inc, join with sl st
R3 – ch 1, 5 hdc, 5 hdc inc, 5 hdc, 4 hdc inc
R4 – ch 1 ch 1, 7 hdc, 7 hdc inc, 6 hdc, 6 hdc inc, 1 hdc, join with sl st
R5 – ch 1, 9 sc, 5 hdc inc, 4 hdc, 12 sc, inc, sc, inc, 4 sc, inc, 3 sc, join with sl st
R6 – ch 1, 9 sc, hdc, hdc inc, 2 hdc, 2 hdc inc, 3 hdc, hdc, inc, 2 hdc, 18 sc, 2 inc, 3 sc, inc, 5 sc, join with sl st
R7 – ch 1, 6 sc, 8 hdc, 2 hdc inc, 7 hdc, 20 sc, 2 inc, 12 sc, join with sl st
R8 – sc in each st around
Assembly
To sew it into an envelope, on the side with ch 6 loop, count 15 rows, and fold. Attach with a couple of safety pins on either side. This will be the bottom. Count 23 rows and fold, use safety pins to hold together. This will be the top. Attach the button on the inside of the body.
Attach brown yarn at the top and stitch side closed with a row of single crochets. Repeat on another side.
The nose was embroidered with black yarn. I make sure it was centered and marked with pins, I made an outline with the yarn and sewed the nose vertically until I achieved the height I wanted. I added a line between the nose and the mouth with the same yarn and tied it off.
The eye patch was sewn on with the long tail left after fastening off. Make sure you attach to the body just under the patch so the stitches can’t be seen.
Sew the white pieces onto the eyes.
To attach the eyes, I first made sure they were even and where I wanted them and then held them in place with safety pins. To sew them on just use the same technique as the patch.
The ears I simply folded in half at the top and attached to the side at the top.
Make sure all ends have been weaved in and that’s it! You have your very own Pajama Pup!


Comments
Aaaa this is something my son will love! It is so sweet. <3 Thank you for sharing!
You’re so welcome 🙂
I love it, how cute! My nieces would love them in white like their doggie but I can not be trusted to pick this craft!
Thank you
I’m not very good at crochet, but I think even I can make this. My kiddos will LOVE it.
Have fun with it!
You’re so creative. My grandbabies would love this! It’s so much more fun than putting your pajamas under your pillow like we used to do.
I agree and thank you.
This has to be the cutest crochet pattern I have seen!
Awe, thank you!:)
Oh my goodness! That turned out so darling. I can’t believe you made up that pattern yourself. My grandma has been crocheting for years, it’s a hobby that I would like to take up myself. Homemade items are so valuable because you know how much time and love are put into them!
Thank you for the kind words! I completely agree with you, handmade is so much more personal. 🙂