Making Kombucha at home
Good day all,
The last time I posted I wrote about growing your own SCOBY to make homemade Kombucha, this time I want to talk about the process of brewing it.
In order to make Kombucha, you need a pellicle which is a type of SCOBY – Symbiotic Culture Of Bacteria & Yeast.

Brewing Kombucha is a very easy process and costs pennies to make. In my opinion, there is no comparison to store-bought, everything from taste to cost is better! All it takes is time – for most of the process all, you have to do it leave it alone and let it do its thing.
Disclaimer – This post contains affiliate links. If you purchase something through an ad I will receive a small commission. Thank you for your support.
A few things to keep in mind ~
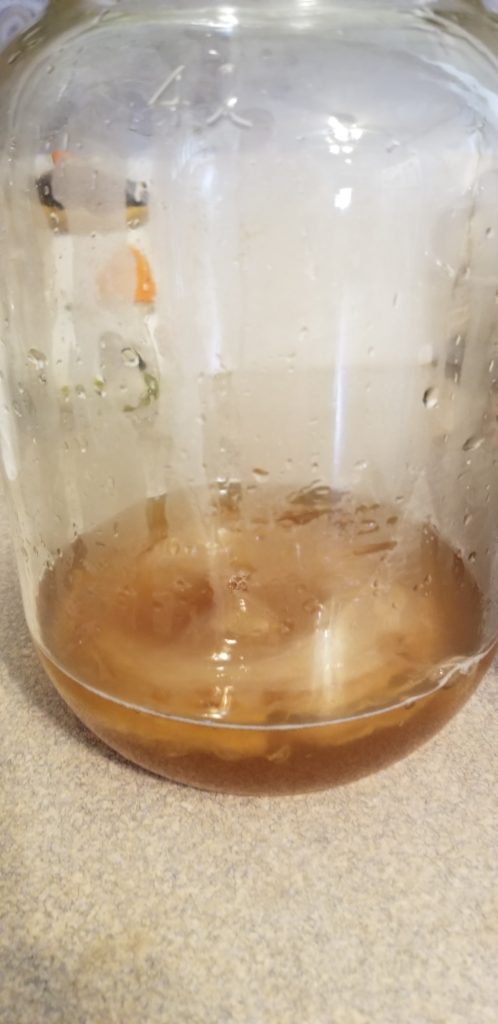
If you were like me the first time you brew you’ll have all sorts of questions with all the things you see in the jar. The SCOBY can either float at the top, sink to the bottom, hang around on its side or even flip upside down – these are all normal things.
You may see brown stringy things coming off your SCOBY – this is also normal. It’s the Y in SCOBY – Yeast, it’s a good yeast and you want that but also don’t worry if you don’t see it, that’s fine too.
2 of the most important things to watch for – mould and fruit flies!
Mould is something to look out for. It doesn’t happen very often, in fact, it’s never happened to me but I make sure to watch for it.
If you’ve used a utensil that hasn’t been cleaned properly or if you haven’t washed your hands before touching your SCOBY, you could get mould. It’s a good idea to wash your hands and utensils and then give them a quick rinse with vinegar to remove soap residue.
If you don’t use enough starter tea or your starter tea isn’t strong enough, you could get mould.
Don’t focus or worry about it too much; as I said I’ve never had an issue just watch for it during your brew. If you do get mould, be sure to toss everything but the brewing jar.
Fruit flies are another thing you should watch for. You’ll need to keep your vessel covered with something that’s not airtight. So having a clean kitchen towel secured with a rubber band is a must. Thinner fabrics aren’t advised. Stuff like cheesecloth doesn’t work well because it’s so thin that fruit flies can get in. If you do get them then be sure to toss it all – liquid and pellicle! Also, it’s a good idea to keep some sort of fruit fly trap near your brewing station.
You’ll need to stick with either green tea, white tea, red tea or black tea for your first ferment. You can mix those if you choose; maybe a few red tea bags and a few black tea bags. That part doesn’t matter but don’t experiment with herbal teas or add anything else to it. You can experiment when it comes to the second ferment.
Now on to the process ~
Ingriedents~
A SCOBY ~
You can grow your own and there are step by step instructions in my last post http://happyandhandcrafted.com/grow-your-own-scoby-and-brew-your-own-kombucha/ or you can get one from a friend, someone in your community, local buy and sell sites, Amazon, there are lots of ways!
Sugar ~
Real sugar is a must, with no sweeteners. I’ve read that you can use honey as long as it’s pasteurized ie. store-bought. Raw honey has antibiotic properties so it would not get along well with the bacteria in the brew. I don’t buy honey from the store, I buy from a farm so I won’t be trying that. I personally use organic cane sugar or turbinado sugar, if I’m out of those I’ll use plain white sugar.
Tea ~
As I said earlier use black, red, white or green. Black tea is best. Try to make sure there are no added oils in it as that can harm your SCOBY. My personal favourite is orange pekoe.
Water ~
There is some debate about the type of water to use. Filtered, boiled tap water, tap water that’s been left out for the chlorine to dissipate, or right out of the tap. In my opinion, it doesn’t really matter. I use all of those and have had success with all of them. As long as your water is drinkable, I say go for it. Part of the reason to make this at home is cutting the cost if you have to buy special water all the time that kind of defeats the purpose.
Utensils~
A vessel – glass is best but as long as it’s not plastic or metal you’ll be fine. The one I use is about 1 gallon.
A large bowl – something large enough to brew the amount of tea you’ll need. 12 cups is the amount I brew per jar.
Silicone or plastic spatula – this is for stirring. I try and stay away from wood or metal as much as possible.
Something to cover the top of the jar – this shouldn’t be airtight. A bar towel, muslin cloth, coffee filter etc.
How to~

Firstly you’ll want to brew your tea. When I started small with 1/2 a gallon and quickly realized that wasn’t going to be enough and doubled it next brew. You’ll need to make the tea quite a while before you put it in the jar with the SCOBY because it needs to cool to room temperature. I make mine when I get up in the morning and usually by the time I’ve had my coffee and shower it’s pretty much ready to go.
Fill a sink with hot soapy water, then fill the other sink with hot water and vinegar. You need to wash all your utensils and then rinse them in vinegar water to make sure there is no soap residue as that can harm your SCOBY.
Once everything is washed and your tea is cooled add the tea to your brew jar then add your SCOBY and starter tea. Cover it with whatever you decided to use, secure with an elastic band and set it in a spot on the counter that is out of direct sunlight or in a cupboard.

It’s a good idea to date your jar to keep track, it can be easy to forget.
Now you wait. It doesn’t need to be stirred at all but I suggest tasting it after about 4 days. I don’t like mine too vinegary so for me it takes about 4 – 5 days in the summer when it’s warmer in the house and about 7 – 8 days in the winter when the house is cooler. Depending on your tastes the brew can take anywhere from 4 days to 30 days.
That’s really all there is to brewing kombucha!
Next time I’ll show you what to do when it’s done brewing and how to flavour it.


-
Tagged fermented drinks,fermented tea,flavouring kombucha,homemade kombucha,homemade soda