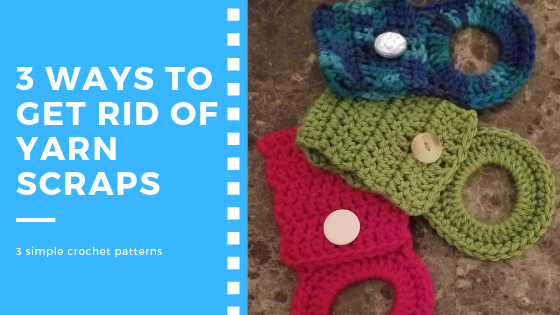
3 easy ways to get rid of the scraps at the bottom of your yarn box!
This post contains affiliate links which means if you click on an ad and purchuse something through that ad I may get a commission at not extra cost to you.
As a crocheter, I use a lot of yarn and end up with a lot of scraps! When I say scraps I mean a couple of different things; there are the little ends you cut off after weaving them into your finished work and there are the larger pieces that aren’t enough to make much of anything so they’re just rolled into a little ball and fall to the bottom of the yarn box. After a few projects have been completed the question always is, what to do with the scraps?
My mom told me a long time ago to save the little ends that you cut off your finished work and when you have enough use them to stuff a pillow. If you’re like me and don’t like waste this is a great idea! It doesn’t take long to have enough to stuff an accent pillow if you crochet as much as I do! 😉
As for the other leftovers, the ones that are bigger than the end bits but too small to make anything very big. I thought of a few quick projects to take care of those. They are all easy enough for beginners and they make unique gift ideas and stocking stuffers or if you sell your items they are an easy sell but, most importantly, they’ll clean up your yarn box!
#1 Tea towel holder
Materials:
A small amount of yarn
Appropriate sized hook
Thick hair tie
Small to medium-sized button
Abbreviations for all patterns:
Sc – single crochet
Dc – double crochet
Sl st – slip stitch
Ch – chain
Hdc – half double crochet
Sk – skip
Pattern:
Ch 1, sc in each dc around, join with sl st
Ch 1, dc in the next 10 st
Ch 2 (counts as first st) dc across and repeat for 10 rows.
Finish off, weave in ends.
Attach a button in the middle of the second row of dc. Fold the top over and fasten the button. (make sure the button fits through the dc gap before attaching)
So easy, right?
#2 Card Wallet
Materials:
A small amount of yarn
Appropriate sized hook
Small to medium-sized button
Pattern:
Ch 15
Dc in each ch st (15)
Ch 2 (counts as first dc) dc in each dc across. Repeat this until you have rows total. Finish off and weave in ends. (this is the back side)
Make the front the same as the back side but only up to 5 rows of dc. Finish off. At this point, you could weave the ends in but I left a tail long enough to attach the front to the back because I feel like that makes for less weaving.
Sew all together and attach a button to the middle of the top row on the front (again, make sure the button fits through the dc gap before attaching)
#3 Change purse/trinket holder
Materials:
A small amount of yarn
Appropriate sized hook
A few larger beads (optional)
Create a magic ring with 10 dc – If you don’t know how to create a magic ring, there is a great link on how to below!
https://www.allfreecrochet.com/Tutorials/How-to-Crochet-the-Magic-Circle
Row 1 – Ch 1, 2 dc in each dc around, join with sl st.
Row 2 – Ch 1, 2 dc in first st, 2 dc in next st and repeat. Join with a sl st.
Row 3 – Ch 1, Hdc in second st from hook, hdc in sk st and repeat until the end, join with sl st.
Row 4 – Row 7 – repeat row 3
Row 8 – Ch 1, sc in each st across
Finish and weave in ends
To close it, braid or twist some yarn long enough to be weaved through with room to tie. I added 3 wooden beads to each end and knotted it.
To weave – start at the beginning stitch on the last row of dc and weave inward (if you don’t use the beads on the end then attach a safety pin and it goes a lot faster). Weave in and out of the
Do you have any tried and true ways to get rid of the extra yarn at the bottom of your yarn basket? I’d love to hear about it!


Comments
Super cute! great ideas!