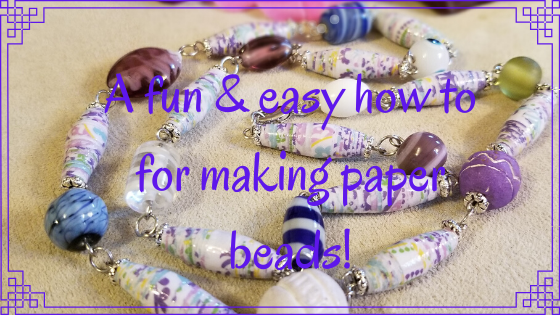
Making paper beads
Disclaimer: This post contains affiliate links. If you click on an ad a purchase something through it, I could receive a commission at no extra cost to you. Thank you for your support
Good morning or afternoon or evening where ever you are. Thanks for stopping by!
Paper beads are something I taught myself to make fairly recently. It’s a fun way to pass the time and it’s something that’s perfect for all ages. Kids can make them and string them on pieces of wool, great for fine motor skills. Adults can make them, seal them and finish them and they can make some truly stunning jewelry!
This craft costs next to nothing because you can use things you likely already have or can pick up at the dollar store. If you want to do this as a hobby to make money it may cost a fraction more but certainly, nothing that will break the bank!
~ Supplies ~
White glue. Any kind of white school glue will do
Bamboo skewers, toothpicks, chopsticks, or straws. (chopsticks and straws are better for little people fingers) Personally, I prefer bamboo skewers.
Paper. Just about any kind will work. Flyers, magazines, newspapers, junk mail, scrapbook paper, old books. You can even paint a design on paper with any kind of paint or make the bead using white paper and paint it whatever way you’d like. Use your imagination. My suggestion is, try it and if it doesn’t work you really haven’t lost much.
Paper cutter or scissors
Something to hold the beads while they dry. A piece of styrofoam or something similar. I use an empty kleenex box turned upside down, the skewers poke a hole in it so it’s perfect and cost nothing which is even better.
If you’re making these for jewelry, you’ll need some sort of varnish for them to make them strong. You can even use clear nail polish, however, if you’re making a lot of these it can get costly because it takes several coats.
There are a variety of templates for paper beads online that are available to print off or you could experiment, which is what I did. You can just freehand cut them or measure them out with a ruler. You’ll definitely get some interesting shapes and figure out what you like best for your projects.
~ How to ~
Measure and cut your paper into whatever shapes you desire. Take one end and roll it tightly over the skewer (not so tight that it won’t come off though). Once you get to the last 1/2 inch use a paintbrush to paint on a bit of glue. Press the end down and hold it there with the end of your paintbrush until it stays. Make sure the tip stays flat before you move on. If it’s not flat then while it dries the tip can curl and then no matter what you do it won’t be flat.
The time it takes to hold will vary depending on the type of paper you use. The thicker the paper the longer it will take for it to stick. Once it sticks paint more glue on in a thin layer around the whole thing especially the edges.
It will take a little time to figure out what technique works best for you but it won’t take long.
Once it’s stuck and you feel you’ve added enough glue, remove it from the skewer and place it on whatever you have decided to dry them on.
The skewers come in slightly different widths. Try and pick the wider ones for wrapping and the slimmer ones for drying.
I’ll fill up the slimmer skewers to the top with beads to dry rather than just one on each skewer. This seems to work better for me.

Once the beads are dry you can paint them or dunk them in whatever varnish you choose. Modge podge works but didn’t give the finish I was looking for. I started to use clear nail polish but I found I was going through that too quickly. I went to Home Depot and got some diamond wood finish and so far so good. My advice is to stick with something water-based because it makes cleaning up easier.
~ Using your paper beads ~
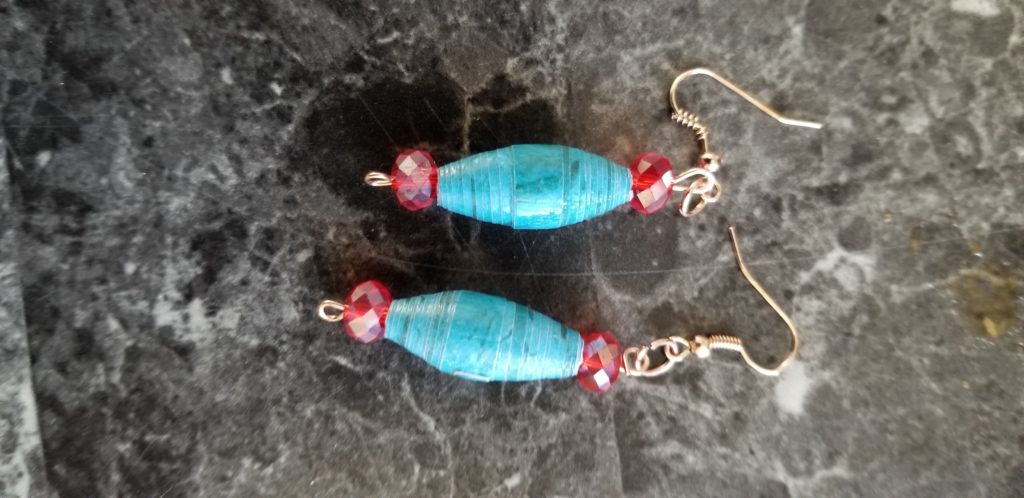


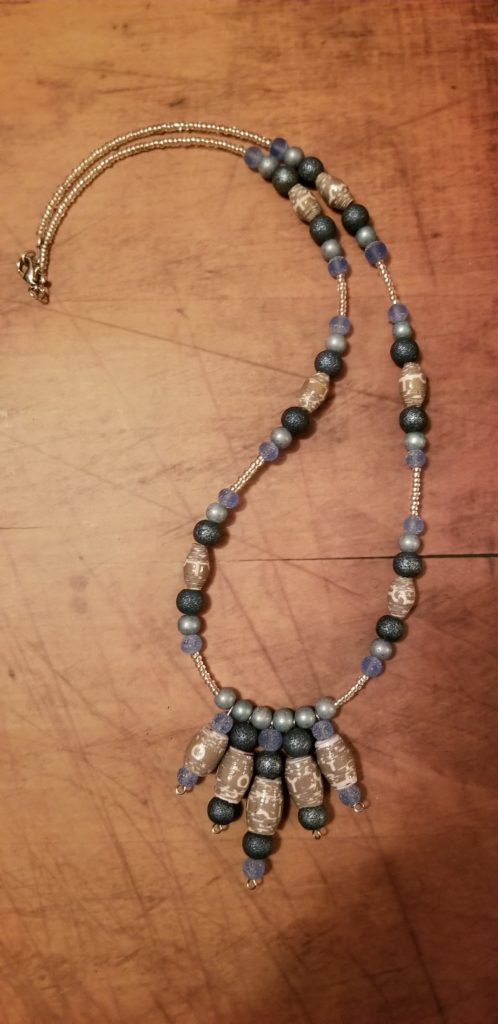
Earrings, bracelets, and necklaces are perfect for these beads or if you’re really adventurous you could make a beaded curtain! 😉


Comments
I love this idea thank you. My daughter is Austin and has her own business making and selling earrings lately beads have been expensive this will be a great way to keep her in business until our bead shows open back up. Thank you for sharing.
You’re welcome. I’m happy it was useful for you 🙂
Love these paper beads!!! May I ask, do you use gloss or semi-gloss Diamond wood finish? TYA
Thank you! I use gloss because I like the shine!
I have made these before but yours is much more prettier than mine. I always use junk mail so that I can up cycle the paper. Thank you for reminding me of this fun craft and some easier techniques.
You’re welcome! It is a really fun craft…relaxing too!